This blog has moved!

Please join me at: www.heatherleechan.com/blog and there I will share with you my art and life!

Sunday, October 20, 2013

Lady Poppins at Storefront Deals!

I have some exciting news!

Today, Monday, October 21, 2013 and for a two days after you will be able to buy two of my art prints at Storefront Deals.


It is an awesome new site and this is how they describe themselves:
 
We team up with top notch sellers to bring you quality items at a low price.  We love handmade and small businesses and we work to promote their awesomeness.  Deals only last 2-3 days, so get it before it's gone!
 
I have seen a couple other sites like this where they feature daily deals, but what I love about Storefront Deals is that it promotes small businesses! How wonderful for all of us on Etsy and working from home. 
 
I feel honored to participate in such a great site. The graphics are so cute too, but it's because it is by graphic artist Kimberly Church and here is a link to her cute shop One Word Designs.
 
 
For the next couple days I will have these two prints to choose from:
 
 
Vintage Camera and Floral Watercolor Print
 
Typewriter and Floral Watercolor Print
 
So if you were contemplating buying a print, now is the time! Or just go check out the other deals and save the site in your favorites. Then you can pop in and see what's new!

Tuesday, October 15, 2013

My Secret Potty Training Tip


I suffered more years than most potty training ONE child.

Yeah.

I can't blame it all in him though. Because when things became frustrating, I looked back through time to when he was a BABY. Not even a year old and he was trying to HOLD IT IN. I can still see my little guy holding on to the couch (he was in that I-can't-walk-yet-but-I'll-hold-the-edge-of-the-couch-phase), crossing his legs, and his face would turn red. We all figured he was going.

NO. He was holding it IN.

At 2 we dabbled with the idea of potty training. At 3 we committed. At 4 I was so frustrated I would cry.

"Oh, boys take a lot longer than girls," they would say.

"As long as he can go by Kindergarten, there's no need to worry," others would say.

And "No one will remember this when he is 16."


Well, first off, your kids were potty trained by 2. Thanks for pretending not to judge me.
Second, I am worrying. This kid might be the only kid that will have potty issues in Kindergarten.
Third, I will.

Well, now that he is 5, I am happy to report THIS TOO SHALL PASS. If any of you moms are in the same boat I was, I am SO SORRY. I could cry for you just thinking about it.

It really was horrible. First there was the feeling that I was being judged for the shortcomings of my child. Maybe this was all MY fault. Was I feeding him the wrong things? Maybe. But kids are picky. Sometimes you just want them to eat, so you make it easy for you and them. There was the nice coaxing, the pleading, crying, yelling, apologies, threats, rewards, crazy rewards, potty movies, potty books, google searching, and doctor visits.

Finally we found the right mix. We used Miralax, but that was messy. So that came in MUCH smaller doses. Then came my friend's suggestion to use a homeopathic remedy (we diagnosed him using a homeopathic website and gave him Hyland's dissolving tablets as directed---for his symptoms he needed Silicea 6x). If you are looking for a remedy this site has a section to help you.

And I think between the two things a miracle occurred!

He had just turned 4 when all of a sudden, we were a happy family again. I cannot begin to tell you how much stress this put on my relationship with my son and me. I hope he never remembers how hard that was for the two of us. But we made it.

Please tell me I am not alone in that battle?

Anyway, I am sorry for the long post if you were looking to head straight to my top potty tip.

Here it is:


Put a panty liner in the rear end of your child's underwear.


I thought I might be a genius when I discovered this. Someone most likely thought of it before me, but I had never heard it suggested nor had I seen it pinned on Pinterest. So this is revolutionary.

If your child has "accidents" I'm sure you hate to clean them as much as I did...

When you put the panty liner on, say they do go. Welp, the fabric in the prime target area has been protected! You just rip it off, dispose of the mess, and then the underwear can go in the laundry!!

So that's all I've got. There's a million "How to Potty Train Your Kid in a Weekend" tutorials, but those never worked for me.

So this is for all you other gals and pals :)


***
Afterthought:
I just might have to delete the "details" soon since this is the internet and nothing is worse than Mommy blabbing your secrets. But for now, I hope it really does help someone else!


Monday, October 14, 2013

How I painted a canvas custom painting for a nursery


My husband's sweet friend contacted me and asked me to do a special painting. She is having a baby girl around late December and wanted to use the painting as the focal point of the room as well as the inspiration for wall color, bedding, etc. I also have to tell you that this gal is gorgeous. As in, we all wish we looked half as good as her while we were pregnant. She is a doll!

Now first off, what an honor! I know that when I was expecting my two pumpkins decorating the nursery was one of the most supreme delights. What you put into the baby's space or room defines you hopes for your sweet little baby. Working on this felt really special.

But...custom orders are intimidating! Especially to a newbie like me. You worry a lot about whether you are heading in the right direction. You feel really self conscious too. When you are painting for yourself it doesn't matter if you mess up. You just get a new sheet of paper or whitewash the canvas. When it is an order you don't want to waste time! Who wants to dilly dally? Thankfully this painting was a fun assignment and right up my alley. I enjoy doing whimsical, sweet, children's paintings.


These were the guidelines or suggestions I was given:


-Acrylic or Oil Paint
-Large canvas painting 2x3 feet (a really great size for a kid's room)
-Pretty
-Soft
-Calming
-Color: pinks, purples, yellows, soft blues, and greens
-Dahlias
-Little girl on a swing with dark hair and a white dress

And then the process:


So I first started sketching with a pen and paper.

Then I wanted to get a feel for the colors and the setup, so I made a collage in photoshop using photos I manipulated. You can do this too! Collect some favorite pictures from the internet from sites like Getty Images and use them as inspiration or a model for what you want to create. The internet is such a great resource for artists. Especially when doing human forms.

Collage made in Photoshop to give an idea for colors and setup.

Next came color blocking the sky light blue and the ground green.

Next I tried something different from normal: I mod podged torn tissue paper onto the canvas. It gave it a cool, random crinkle effect and since it was a lustre finish it had a glossy gleam to it. I made the mistake of painting a sky with gloss before, but I ended up loving the effect! When I painted images on top of it they would lack the gloss, so when the painting was angled a certain way only the background would gleam! The effect shows off most during sunset.

After that dried I started to work on the clouds.

Then came the meat of the picture: sketching the details.

I drew the tree limbs, the girl, and some flowers. I got bored drawing the flowers and just decided to paint.


And then finished!

I hope this helped anyone that is starting to paint or that is starting to get custom work orders! What is wonderful is that if you like it, then you can make art prints of it. Sometimes something that is requested isn't normally something you would do...but ends up being a hit! So take a chance on it.

Just be YOU :)

Sunday, October 6, 2013

Take a leap, a hop, or even a smidgen of a step forward...


For years I have just dreamed and wished that in some fantasy land I could be paid for my artwork.

I never valued my work as being worthy of pay. My friends and family told me it was. Strangers even said so.

But I didn't believe them.

They were just being nice or they feel like they have to say that because they love me.


But then I grew frustrated. Here I am, a mom. I graduated from college at 21, a month later was married, and at 22 I became a mom. I love my little boy and pint sized girl. But sometimes a mommy has gotta get away from the house! I substitute teach one to three days a week. I love getting out and being a teacher, a professional. For 7 hours I am not Mommy, not in charge of dishes or wiping a butt. But as much as I love teaching, it still was missing something.
And then I realized I really wanted to be an artist. So I secretly dreamed about it and plotted what I would do with an Etsy store. Every time a friend said, "You should sell your work," it was an extra push. And then I Print From Home had a Valentine's giveaway for $50...and I won it! So I ordered some prints of my works...and posted them on Etsy.

And that was the beginning.

The wonderful beginning! It has only been 8 months since I first started selling things in my shop (I decided to save the name "Lady Poppins" in January of 2011, but didn't post anything for TWO YEARS), but within that small amount of time amazing things have started to  happen. And now I really understand that God helps those who help themselves...because it was up to ME to take that leap. There were wonderful nudges and messages that were sent to me constantly, but I just said "Thank you" and simply forgot. God was telling me I could have my dream, but I had to believe in myself and do some dirty work.

I have been blessed. I have had unending support from my husband, mom, family, many friends, and customers. And of course, the ever constant love and support from my Heavenly Father.

I am excited for what is to come, because I am going to work at it. Sometimes custom orders and requests are scary and intimidating because I have never done it before, but I know I can do it! I'm experimenting right now. A watercolor here, a canvas painting there, a blog header, digital designs, and special projects there.

I don't know where I am going to end up, but I'm just going to go along for the ride. Because this is fun, exciting, scary, and wonderful! I love to think that something I've made can make another person happy or help them.

And maybe, just maybe, this will inspire you to make that tiny leap. No matter how small, it's one step forward. And with God on our side, anything is possible.

Thursday, October 3, 2013

Bringing out the Halloween Decor

Halloween Clip art available in the Lady Poppins shop

The Jack O' Lantern pumpkins would look so cute printed out and framed for Holiday décor!

My son cried alone in his room yesterday.

Because Daddy was making him wait til Thursday (today) to put up Halloween Decorations.

Hard life, I know.

It's cute how much he likes Halloween, because his Daddy is a big fan of it as well. Matt would tell me all about how when he was a kid his buddies came over and they built a fantastic haunted house for the trick-or-treaters to go through. The last couple of years we have been throwing a grown up Halloween Party and his enthusiasm is adorable. Sadly this year we will be taking a break. It doesn't help that TWO of the kids birthdays sandwich the Saturday we would normally do it.

The first year he was Mugatu from Zoolander:


Last year was the best--Walt White from Breaking Bad:

Awesome, right?! And my costumes have been boring but pretty...such as this one, a fairy:


Our friends Ben and Mandie came as....Matt and me! LOL! We love them :)


Are you big on Halloween at your house?

Halloween would be forgotten if it weren't for my husband and kids. Christmas is my favorite!!

Tuesday, September 24, 2013

Bloglovin and a New Fall Watercolor

Have you heard of Bloglovin?

You make an account and then you type the name of all your favorite blogs into the search engine and when you find it, click Follow. You can even categorize your blogs (art, photography, mommy, etc). When you logn to Bloglovin and you land on your homepage you see all of the most recent blog posts from your favorites!

Say goodbye to searching for your favorite blogs in your web browser's favorites and being disappointed when you check up on a blog and they haven't updated. All you do is scroll down your Bloglovin home page and you are ready to go!

You can also add me to your blog reads by typing in Lady Poppins and you can follow me and what blogs I read by clicking on this:

You can follow my blog with Bloglovin

In other news, here is a new painting I have done for Fall!


Saturday, September 21, 2013

Autumn Leaves Please Fall by Me...

It is officially Fall this coming Sunday...and it is in the high 90s.

I remember watching Casper (the one with Christina Ricci and super-cute-at-the-time Devon Sawa) and wishing that when school started leaves would be bright colors of green, yellow, orange, and red.

My home still looks and FEELS like Summer. And what makes me really confused is seeing all of the seasonal décor at Michael's and Target. Or worse---the coats and scarves! As if! It's like as if we live in Alaska and the sun just keeps on shining so you have to pretend that it is night and just go to bed. Here we have to pretend it's a crisp Autumn, but really we are just baking like crisp bacon.

In honor of the rest of you glorious season-changing states and countries I give you my own watercolor clip art of fall leaves, pumpkins, and flowers:


And then here is a new one:


Here are two free leaf PNG / clip art images for you :) The blue one is not part of my set in the shop, but the green one is.


Here is a picture of Clara nearly 3 years ago! These were taken at the end of November and she was only a month old...I am a horrible mother and put her down on the grass amidst fall leaves in our front yard. But only for the sake of the cutest fall pictures ever!! I can't believe my little girl will be a big THREE year old next month!

Sunday, September 15, 2013

Let's Get Digital

Sooooo, after being urged by a family member and also a friend, I have decided to sink my toes into creating digital clip art.


Here is my first set:


And I am giving you a freebie! This is a PNG image of a teal butterfly resting on a pink flower. If you click on it you can save it. It is in 300 dpi, so it is a nice quality. You may use this for personal use only. Understandably, you are not allowed to resale this image or use it to make product to sell.

This set is super cute and girly. It has pink, mint, teal, and green going on. Here is the rest of it in the shop.   


Meanwhile I have been busy planning a top secret, super exciting project. I can't wait to tell everyone about it! And after that I have two more special projects to work on. This girl is so happy to be busy!

Here is a little saying I made using the clip art: Be Grateful. I think we need to be saying thank you for our blessings all the time.


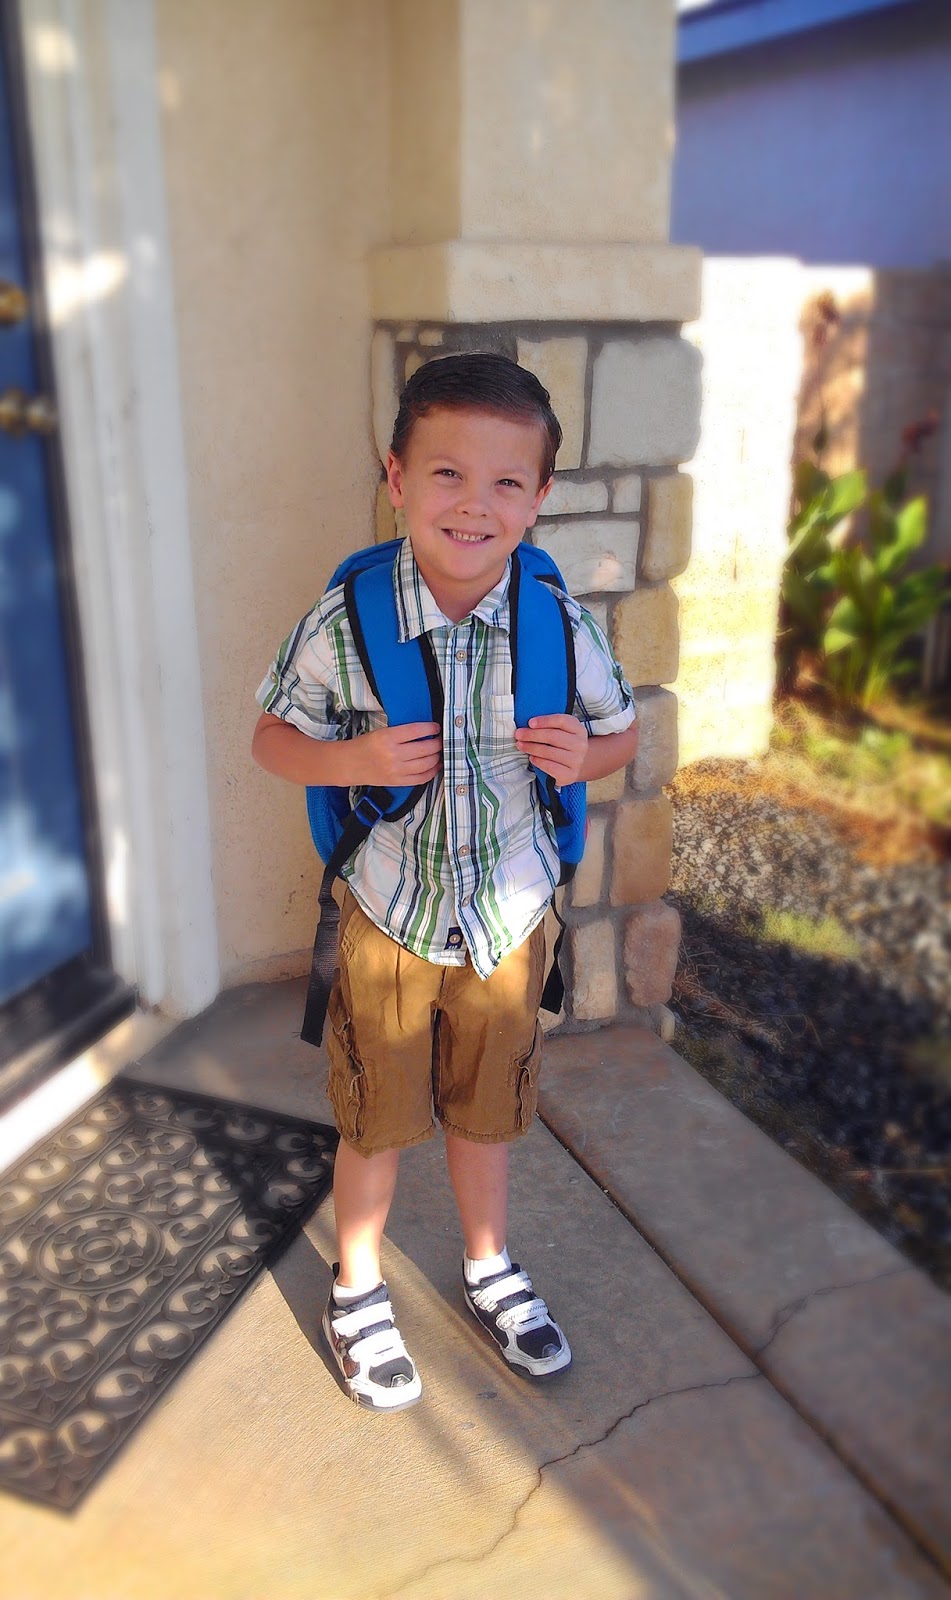
On the home front Calvin started kindergarten. He LOVES it. He just adores his teacher and is excited every morning to go to school.


Here he is on his first day with Dusty the airplane backpack, Kermit the Frog lunchbox, and a huge smile :) Oh, and Velcro shoes because Kindergarten teachers spend a third of their day tying shoelaces.


When I get the chance to edit a few more pictures I am going to have to do a post about our summer vacation. We took a family road trip (2 grown ups, a 5 year old and 2 year old!) from SoCal up to Oregon within one week. Yikes! It was fun, but there are some stories to be told!! This picture above is from Solvang, California. It was the cutest little town EVER. I wish we could move there. It is enchanting.

I hope everyone is adjusting to Summer being over. I have a feeling Fall is going to go by too fast and before you know it Christmas will be here!!

Wednesday, September 11, 2013

DIY Overhead Phone Mount

I had a huge dilemma.

I am starting a new and exciting project where having an overhead mount is essential. BUT my best option for making a video is my cell phone! I love how awesome cell phones are nowadays. My nice camera is old, so the video abilities of it are of a different era.

But how to mount my phone ABOVE my workspace for my video? I saw one where they attached it to a bendable lamp, but of course the two I have were too short. So what's a girl to do?

Um, take your DIY light saber from Pinterest (a pool noodle cut in half with duct tape and electrical tape on it) and attach it to your camera tripod with rubber bands and string. VOILA!!!!

Yes, I have my phone attached to the top part with rubberbands.

I apologize for how excited I am about this, but I solved my problem all by myself! I hope it helps other people, especially for people who want to make instructional YouTube videos or online class videos.

SUPPLIES:
  1. Camera tripod (or you can get creative like me and find something around the house that will suffice)
  2. 4 rubberbands
  3. Half a Pool Noodle from the Dollar Tree
  4. 1 piece of string
  5. Your phone

INSTRUCTIONS:
  1. Put the phone on the end of the noodle with rubberbands
  2. Fiddle with the amount of noodle that needs to be attached to something solid till you get the phone to lay horizontally
  3. Tie down the noodle with string and/or rubberbands


P.S. To use the tripod for my phone when I wanted to film myself, I mounted it to the place you normally put the camera and just used the rubberbands to strap it down.

UPDATE:
When my husband came home that night I showed him this post. He laughed at my creativity and then said, "Why didn't you just use my mic stand in the garage?"

OMG. 

I scavenged the whole house for this solution and it was sitting the garage the whole time!! Well, if your husband isn't a musician with a microphone stand that you can loop some rubber bands onto, then try my pool noodle/tripod approach ;) But I must say, I love using the mic stand because I can easily adjust it to different heights.


Monday, September 9, 2013

Mommy and the Half Truths


So my little girl is almost three... I really wanted to take pictures of her in front of a special quilt passed down from my Nana, but she really wasn't in the mood to take pictures. She would rather read Olivia (above) or hide behind her bed (below).

In order to get the one good picture of her with her babies I had to hold the camera in my lap and snap a photo in secret while I read her a Santa Claus story. Just one of the many tricks I use while parenting.

For example, I have told Calvin not to answer the door while I take showers because it might be a monster.

He was so excited to turn 5 that when he started to act up, I told him I would use my super mom powers and stop time. He would not turn 5 if the behavior continued.

"Mommy, how does Space Mountain work?" My husband was stumped. Does he tell him the mechanics of it and ruin the magical illusion? Nah, just ask me. My answer? Mickey Mouse uses his magic. Done. Everyone is happy.

Also, little boys and girls only get balloons at Disneyland if it is your birthday. So let's be happy for them!

You know, half truths.


And the fun is just beginning, because Clara is talking in sentences and really understanding things. So inevitably the mommy tricks will continue. I will have to write them down to help all you other moms out. And I hope you are doing the same for the rest of us ;)


Sunday, September 1, 2013

My mom: my best friend.

I LOVE my Mom.
 
She is my best friend.
My role model.
She is just simply THE BEST.


No matter how old I get she still calls me her little girl.
She still spoils me with love.
I can tell her anything.
I am always comforted by her presence.

My mom loves with her whole heart and with complete selflessness.

Example:

My mom is an AMAZING artist. As a child she was a natural, always sketching and creating. In high school her art was published in their yearbook and won awards at fairs. As she got older she enjoyed trying new mediums from drawing, watercolors, acrylics, oils, ceramics, to crafting. She is never afraid to try new things and when she starts to get into something she cannot stop. She almost becomes obsessed. She will constantly work on perfecting her art and her standards are high. She will throw away creations that anyone would claim to be a masterpiece, but if it does not satisfy her, she would rather just be done with it.

So here I was, her first baby, and caught the art bug. My dream as a little girl was to be a schoolteacher, a writer, and an illustrator. But watching my mom made me self conscious. I didn't want to show this master my elementary drawings (which they were! I was in elementary school). She decided that she didn't want me to ever feel that way and put away the pencils. She packed up the paintbrushes. She said goodbye to something she loved so that I could flourish. I makes me teary eyed just to think about how much she loves me and how hard that act must have been.

And thus:

All that I am, or hope to be,
I owe to my angel mother.
 
Abraham Lincoln
 
She started to dabble in art again when I started performing in school plays. She volunteered her artistic abilities to painting breathtaking and realistic sets. Before every show she was backstage in the dressing rooms, head of the makeup. I'm sure her makeup rivaled the Broadway greats with her realistic Cowardly Lion and faces of the like.
 
But she still wasn't painting. I was in college and decided to take a beginning painting class. I would bring home my work and my mom was interested in playing with paints again. So we would sit side by side and oil paint. When we got bored with a piece or stuck we would just switch! She would see things in paintings that I hadn't and vice versa. We had SO much FUN!
 
It motivated her to redecorate the house with her own paintings. Before I knew it my mom had a FULL on art gallery in her house. Which, of course, motivated me to make my own creations since my husband and I were renting our first home.
 
And now, all these years later my mom is back being a fine artist. She went on a watercolor binge the other year and made at least one watercolor a day, if not more. She had so many she would give them away to family, friends, and even strangers.
 
Currently she is mixing it up and doing acrylics, oils, and watercolors. I even set up a little shop for her on Etsy. She decided to name it Now and Forever More, art by Denise Iverson. You should check it out! I have only posted the original watercolors because they are so easy to ship (versus stapled canvas--ugh, I'm still figuring that out myself).  
 
Here are some of her watercolors that are posted:


And now I am thinking I should do a house tour...so you can see her personal art gallery!
 
So maybe that will be a future post. :)